2.11.2014
8.06.2013
Glowing Eyed Dinosaur Tutorial
How to make a dinosaur, or any other fun animal, with a glowing eye:


When you're done, the LED should look like this:


Instructions:
Cut your fabric into the shape of the animal you are making. I draw out the animal on a piece of card stock and cut it out there first to make sure I like it, then trace that shape onto my fabric and cut it out from there. After that cut out a small rectangle to make a battery holder pocket. Attach the rectangular piece of fabric, on only one side, where you want the battery pocket to be. In the case of these dinosaurs- on the stomach. You can either glue or sew the rectangle down.

Take your LED and bend the leads out to the sides. Curl each of the leads around the round-nosed pliers so that they are small circles, like so:

When you're done, the LED should look like this:

Glue the plastic part of the LED down so that it stays in place while you are sewing it together. Take your conductive thread and loop it around the circles that are the LED leads. Loop the thread around the circles a few times and make sure it is tight and making solid contact or the current will not be able to pass through the conductive thread to the LED.
After you do this you can start a simple running stitch (a line of small even stitches that run back and forth through the cloth without overlapping) down the neck of the dinosaur to the battery holder pocket. Sew an "x" on hte inside of rectangular flap so that when the pocket is sewn down completely the "x" will be on the inside of the front of the pocket. Afterwards tie a knot and cut the thread.
Start another series of loops on the other side of the LED, and then make a running stitch from that wire circle (the lead on the other side of the LED). The running stitch should come down to the inside of where the pocket will be. Make an "x" at the inside of the pocket. This "x" and your other "x" should touch eachother. These will be the contact points where the conductive thread will meet the battery and carry the electrical current from the battery to the LED light. DO NOT cross the stitching or you will be crossing the current and cause a short circuit. After you get both of your lines sewn from the LEDs to the battery pocket you can test your circuit. Put the battery in between the "x"s and press it down. If it does not work, flip it around and try it that way. If the eye still does not light up check that the loops around the LED leads are making solid contact. (You can hold them down tightly to see if that makes a difference. If it does, add some more tight stitches around the LED leads.) Also check that the stitching lines do not cross. When your LED does light up you can sew/glue down the rest of the rectangle that is the battery holder, make sure it makes a tight fit around the battery.

Now that you have a dinosaur with a glowing eye you can decorate it. I used scraps from other felt projects cut into shapes and then glued onto the dinosaur. You can glue or sew the decorations down. Hot glue or fabric glue works well.
Here are dinosaurs made by kids ages 3-12:


7.01.2013
Glowing Fabric Flower Tutorial
How to make a simple or complex felt (or other fabric) glowing flower:


Instructions:
Cut your fabric to a flat flower shape, four petaled flowers work quite nicely. The flowers in the photos are made from felt. Start by folding the flower in half and sewing down the fold. I start sewing from where the flower petals split a little to give the flowers more dimensionality, if you want yours to lay flatter/the petals to be floppier just start at the body of the flower.


Cut your fabric to a flat flower shape, four petaled flowers work quite nicely. The flowers in the photos are made from felt. Start by folding the flower in half and sewing down the fold. I start sewing from where the flower petals split a little to give the flowers more dimensionality, if you want yours to lay flatter/the petals to be floppier just start at the body of the flower.

After you've done that, open the flower back up again and fold it the opposite way. Sew that side as well:

Now your flower should be dimensional like these ones:

Repeat if you have multiple flowers. Now you can install your LEDs. Look at the LEDs- for this type of LED, the long leg is positive and the short side is negative. If you want to test this out just hold your LED onto the coin cell battery you have, matching the long leg to the side with the +. It should light up. (If it doesn't try and find another battery to test your LED with, the battery might be dead or just not have enough voltage for your LED. A 3v battery should be enough for the LED. LEDs should come in packages with the required voltage written on the side.) If you are installing multiple LEDs, you may want to mark the positive leg with a permanent marker so you don't have to test them all once they're in the flower.
The wire that makes up the LED legs is not that strong, it often cannot go through the fabric without bending and becoming contorted. I pre-poked holes with my sewing needle because it was somewhat thick, you could also use a pushpin. If the LED legs do bend you can just straighten them, but if they come under too much stress they can break off at the bulb. If you are adding multiple layers of fabric on your flower, just hold them together as you poke the LEDs through. The LEDs will hold them together when they are done.


Insert the coin cell batteries, making sure the positive side touches the positive lead (leg) on the LED. Pinch the LED onto the battery, making sure the ends of the leads are not touching because that will cross the current, causing a short circuit, and they will not light up.
When your LEDs are light up, tape the battery on. Electrical and duct tape work best. These flowers do not have a switch, the only way to "turn them off" is to remove the battery. (Flower tutorial with a switch coming soon.)

Now either cut off the excess on the lead or bend them over so they cannot touch each other like so:

Now you can cover your flower with ribbon, if you want. I hot glue the ribbon on. Don't melt through the tape or you'll likely have to tape them over again.

If you are attaching them to something else, like a hat, bag, shirt, etc. Just add this fabric into the equation when you are poking through the LEDs. If they're hidden you don't have to cover them with ribbon, and that will make it easier to change out the batteries. You can glue or sew them onto the hat, bag, etc. if you want too to make them more permanent.
Here's a glowing flower hat I wore at Maker Faire KC:


Good luck, have fun!
Check for more tutorials soon.
PDF version here:
(The first page is blank. So sorry, I'm fixing it now.)
Maker Faire KC
Maker Faire KC was great this year!


Tutuorials and other info will be up after the 4th of July. I'm working with Hammerspace about some classes so keep an eye out for those in late summer/fall either here or on Hammerspace's calendar here: http://www.hammerspacehobby.com/p/hammercam.html. Hope everyone had fun!


Tutuorials and other info will be up after the 4th of July. I'm working with Hammerspace about some classes so keep an eye out for those in late summer/fall either here or on Hammerspace's calendar here: http://www.hammerspacehobby.com/p/hammercam.html. Hope everyone had fun!
5.29.2013
Wearable Tech & Soft Circuits...
It's getting close to Maker Faire KC (June 29th & 30th) time again and this year I'm presenting some soft circuits. Keep an eye out for (long overdo) posts about EL wire, Lilypads, etc!


(EL wire....)
Make something to share or just come and see what cool science, tech, and crafts are happening in KC: http://www.makerfairekc.com/
3.22.2013
Mercury is 3!
Rainbows and Ponies...
As girly as you can get for a party theme but here it is:Birthday Girl's Outfit:

Birthday girl in a custom made rainbow dress, rainbow shoes and rainbow unicorn headband.

Purple sparkly shoes from the store with rainbow sequins hot-glued on one at a time. For the rainbow unicorn headband I made a horn shape out of tape covered paper and glued the majority of the sequins on before attaching it to the headband. When I got to the lowest section- the purple section I taped the horn to the headband, wrapping the tape around both the headband and the horn until it was secure. Then I wrapped purple ribbon around the area to hide the tape and glued it into place. Next I finished the final, purple, layer of sequins. Then I attached the felt ears (filled with stuffing) by hot gluing them to the headband and then wrapped ribbon around both them and the band. I continued the ribbon down the headband to the end of it.
Decorations:

Rainbow "Happy Birthday" banner and paper chains for doorway.

Balloons, Balloons, Balloons. Believe me- these were fun for everyone! We also included, up high on the fireplace mantle, a cup of permanent markers so that adults and older kids could decorate the balloons.


More paper chains for the window along with paper and ribbon rainbows hanging from the ceiling.

Ponies and horses taken from her collection were adorned with rainbow ribbons.


Rainbow colored canvas bags (6"x6") I got online and decorated with cut felt
(again, hot glued on) in the first letter in each child's name.
Activities:

The dining room transformed into activity room.

Plaster ponies for painting. The "pallets" are paper plates with little plastic
cups hot glued onto them- cheap and effective! The purple cup had some company's logo on
it so I glued ribbon and a paper cloud on top of if.

More "pallets" with rainbow beads and lanyards for custom-made necklaces.
Edibles:

Rainbow silverware- I keep all the left-overs and always buy on a color theme so I had mostly
all of the colors already on hand. I used two of the clear drinking cups and glued a strip of left
over felt to them to spice them up a little.

No small child can say no to rainbow cereal and rainbow goldfish.

What was the ice bucket for? The rainbow ice cubes made with kool-aid! Word of warning- I would avoid the blue colored ice. It made the drinks a muddy brown once they melted too much. The kids loved it, "it's like popsicles in my drink!" The adults used the leftovers later that night for their grown up beverages.
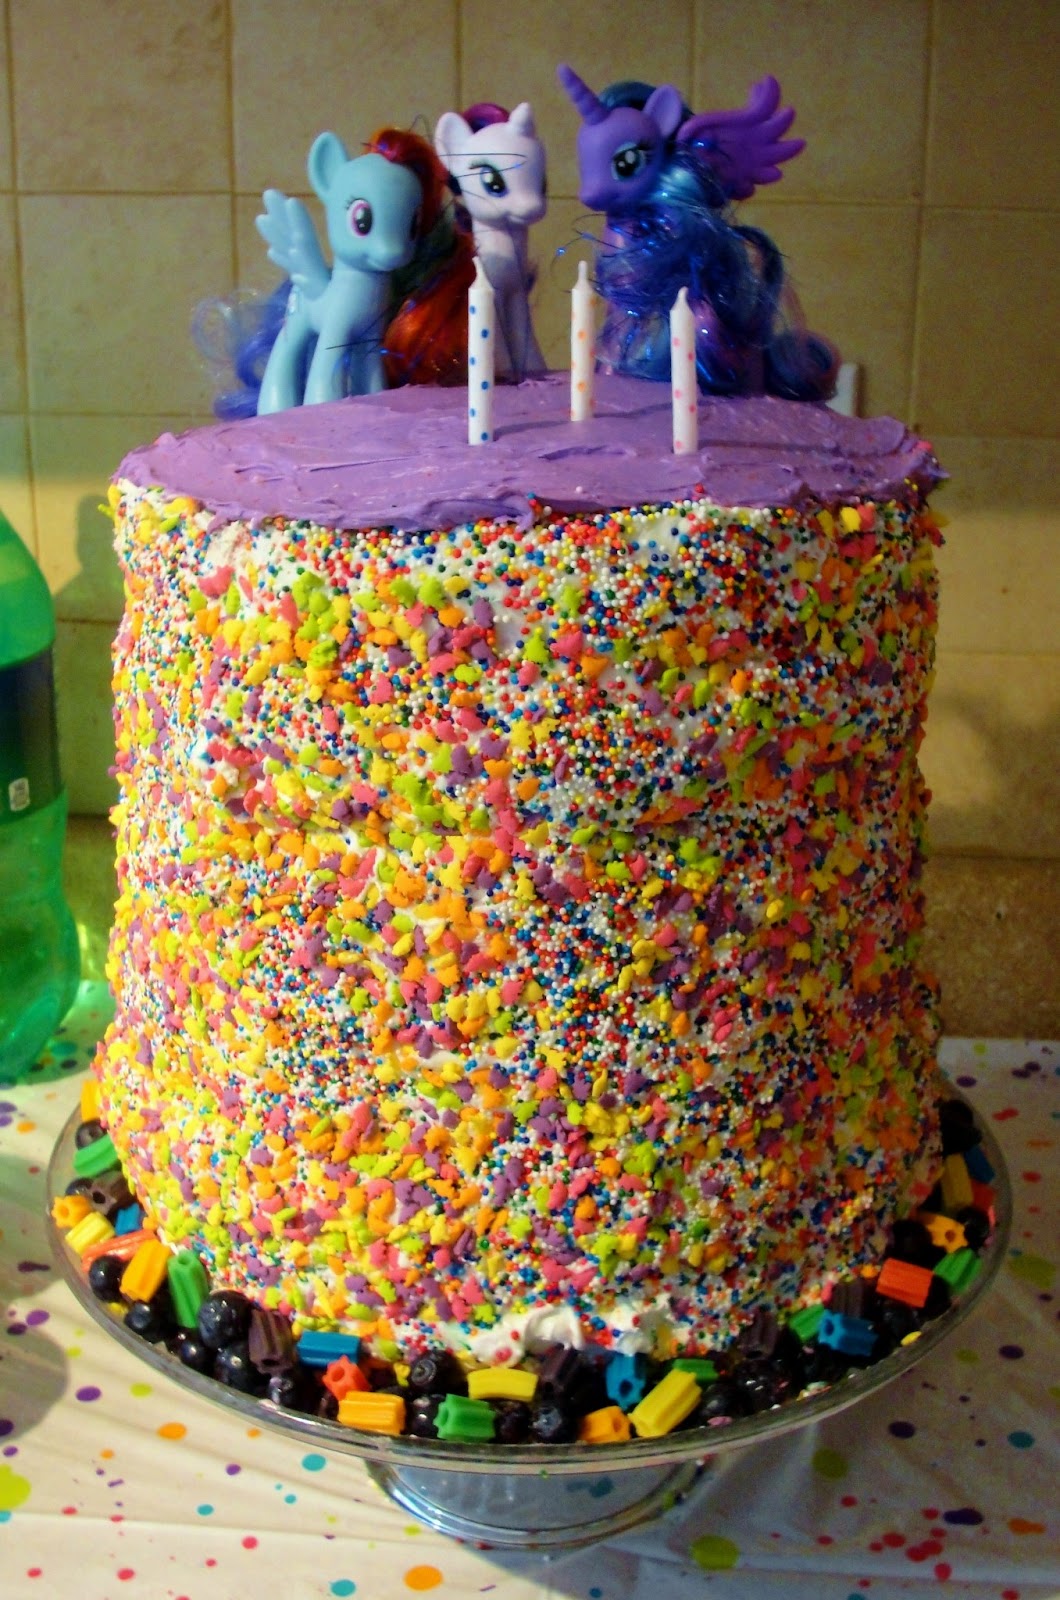
The gigantic confetti rainbow cake with purple icing and three ponies on top. It is
around 18" tall. But wait, there's more...

It's even cooler on the inside.

Yes, a rainbow cake BUT the filling in between the layers is
whipped cream and fruit. Strawberries, peaches, pineapple, kiwi, and blueberries.
This made it a bit less sugary and more naturally sweet.

And here it is after the dads and other adult males got their hands on it:

It doesn't stand so well when 85% of it is gone.
So, overall a successful Rainbow and Pony birthday party.
2.27.2013
Birthday Party #3 is coming...
My daughter will be three soon and I'm working hard preparing decorations for the festivities. She's chosen and all-girl theme of Rainbows and Ponies. Here's a teaser or two:


Three days until party...
Subscribe to:
Comments (Atom)